Monday, November 8, 2010

Radial Symmetry Leaf Painting

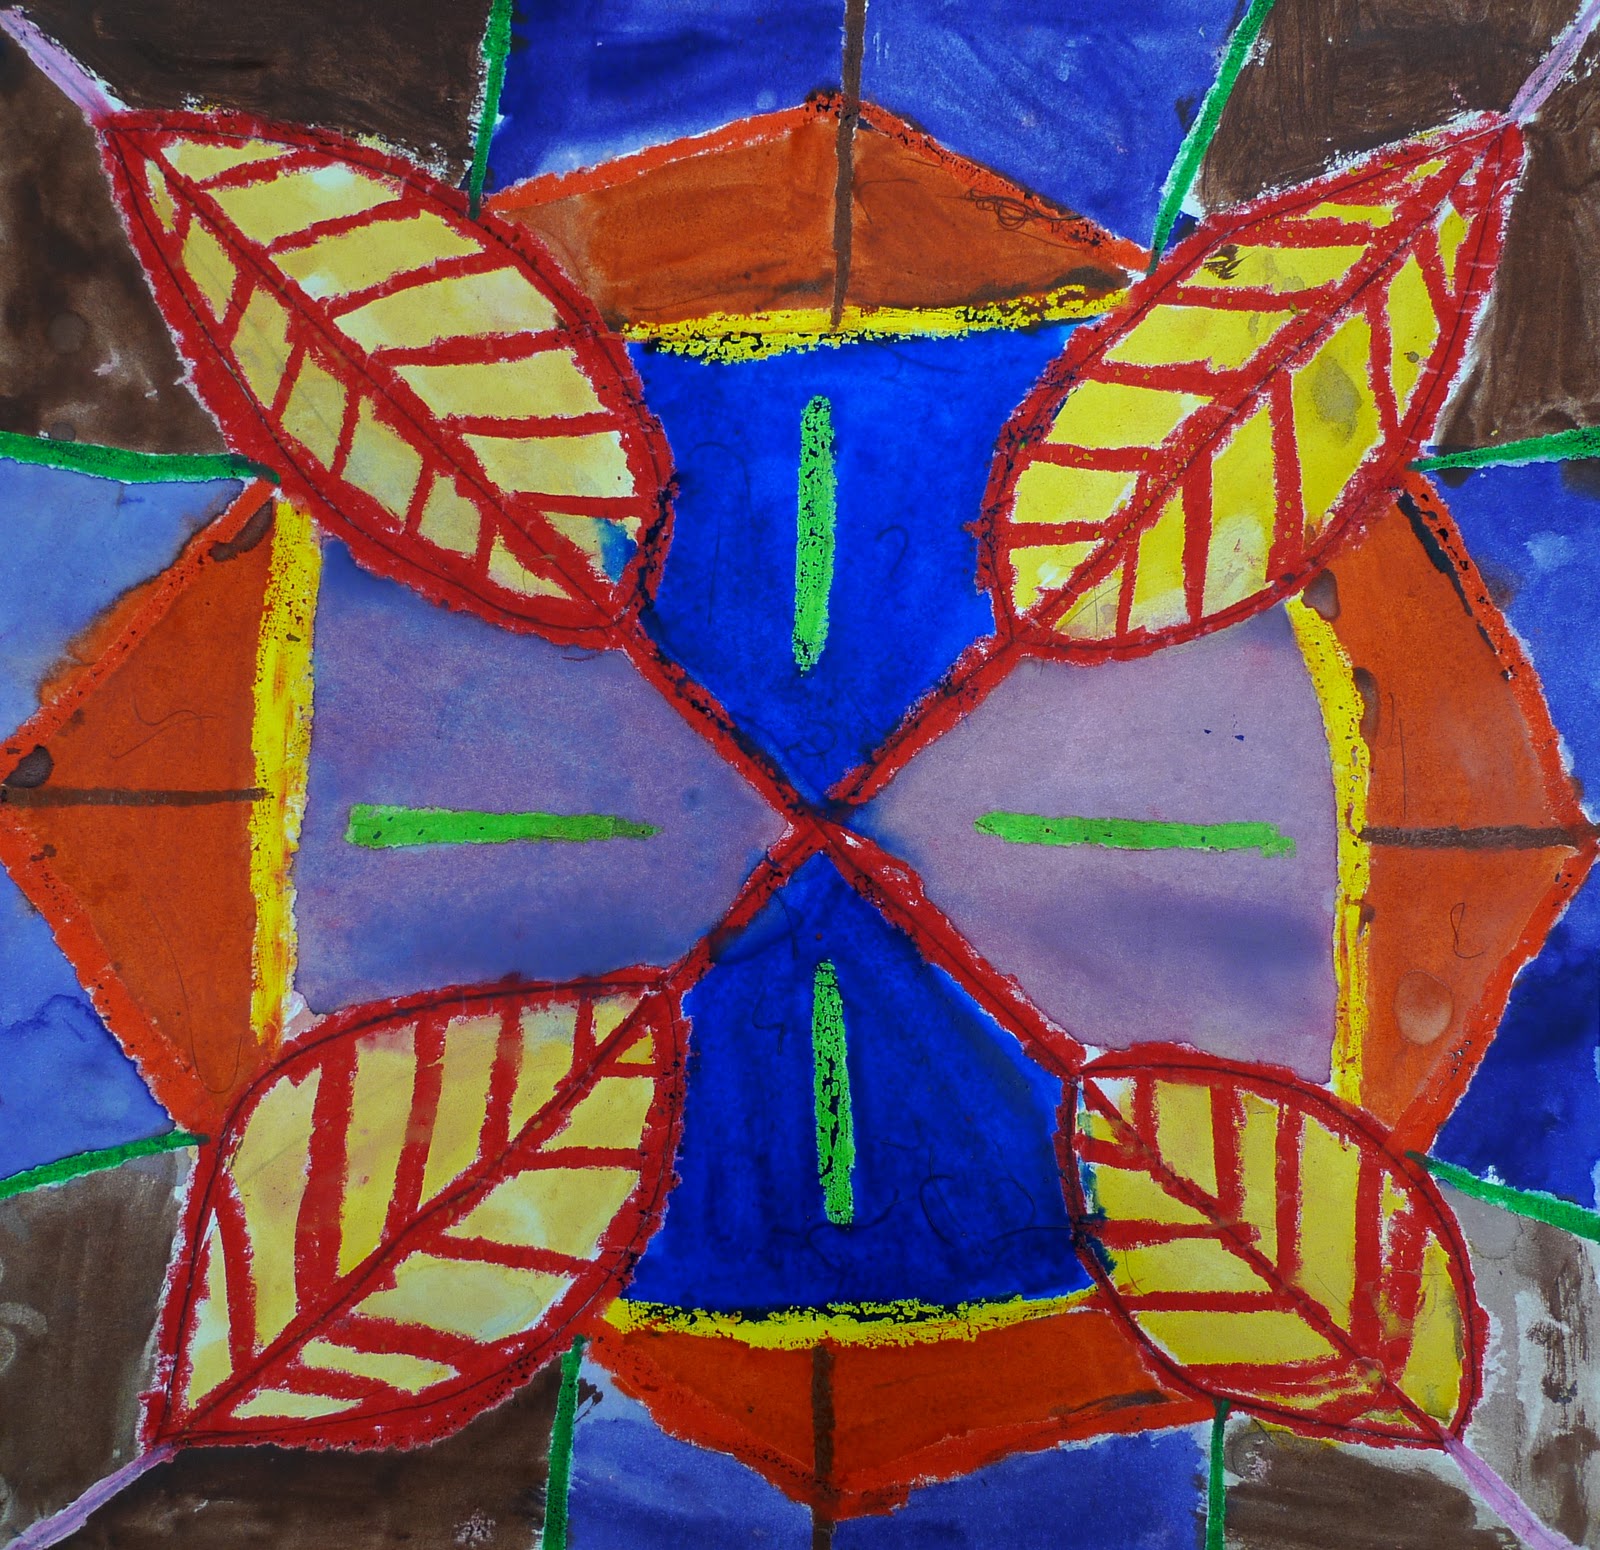
Second Grade finished up their radial symmetry leaf paintings and they are gorgeous!

We discussed radial symmetry and where we can find it in nature.


We started by drawing an X, from corner to corner, on a 12x12 sheet of paper. On each line we drew a leaf( I printed out drawing instructions for a few different kinds of leaves). I demonstrated how to draw the veins and how to add designs around the leaves to achieve radial symmetry. During the demonstration, I came up with this little song..."draw it, turn it, draw it, turn it"( to the tune of 'bop it'); the kids were really into my jam! All around the classroom, my little tune was floating around! Embarrassing for me, but helpful for them!

The drawings were done using oil pastel and then watercolors for the background. We talked about how contrasting colors make our designs stand out.


Sunday, November 7, 2010

Beautiful Oops!

I just found this sweet children's book and wanted to share it with everyone! Every page has some kind of "mistake" on it, like a tear in the page or a paint splatter and it shows ways to turn it into something great, aka happy accidents- my favorite message!!! 


I'm trying to think of lesson ideas based on this book... I was thinking of maybe having each student make a mistake on purpose(a tear, a dot, a scribble) and then I would collect them and pass them out to find a new owner. That student would have to turn it into something amazing. I would love to hear any tips or ideas that you folks have!


Speaking of not being afraid of making mistakes... Here is an inspiring video on creativity.


Have an inspiring week full of beautiful oops!!!


Friday, November 5, 2010

Día de los Muertos Calaveras

I know it's a little late... but I just have to share 1st Grade's inspiring Día de los Muertos Calaveras!


The kids were fascinated with the celebration of Día de los Muertos. We looked at videos, listened to music and looked at lots of artwork of calaveras, costumes, and sugar skulls. We discussed how the Day of the Dead is not scary, but joyful and that it's different that Halloween.


We first drew the skulls onto a black sheet of paper. I demonstrated how to start with a circle and then add a half circle(or a smile shape) to the bottom of the circle. Then draw two circles for the eyes and an upside down triangle for the nose. We then drew flat circles(pancake shapes) for the neck bones and a rounded line for the shoulders. It always amazes the kids how something that looks hard to draw is easy if you break it down. I had one student who shrieked, "OH, I finally get it, everything is made out of little shapes!", and the others seemed to chime in with excitement about this new discovery! I absolutely love those a-ha moments! 


We then painted in our drawings, leaving the eyes and noses black.  I then demonstrated how to paint over the half circle(jaw) and how to add teeth. 


The next week, we used oil pastels to adorn our calaveras. I demonstrated how to draw marigolds, a significant symbol used in the Day of the Dead, often called 'the flower of the dead". I showed the kids a variety of ways to adorn their skulls and printed out many examples for them to use as inspiration.


True to Día de los Muertos, these artworks are so joyful and full of life!         


Sunday, October 31, 2010

Autumn Tree Silhouettes

The past month has been bizarrely warm, producing some amazing and inspiring sunsets. Every drive home, I've been amazed at the vivid colors and beautiful silhouettes that have occurred. Most of the photos below were taken on my mostly boring drive home(by the way, I don't recommend driving while taking pictures!)

I knew I had to do a lesson on silhouettes!


4th grade looked at artist Kara Walker, while we discussed what silhouettes are. We talked about how the nature of silhouettes are mysterious because of the lacking detail. I had the students analyze Walker's art and come up their own interpretations of her work.


To make our autumn tree silhouettes, we started by painting a 12x18 piece of paper in a variety of fall colors. I gave little direction at this step other than demonstrating a variety of painting techniques(color mixing, swirls, etc). I also told them to make sure that multiple colors are visible, to avoid them mixing every color together. Although a few students couldn't resist mixing colors to make a single-colored background, but they turned out amazing regardless! Art is all about breaking rules, right!?

The next week, students used oil pastels to add line details to their paintings. Then they used black paint to add their tree silhouettes. I only demonstrated how to paint the trees, but they came up with many great ideas on items to add, like people jumping in a pile of leaves, birds, tire swings, etc. I am always amazed and inspired at my student's innovative ideas!

Lastly, the students had the option to add sequins to their paintings to represent leaves. Students displayed sparse leaves dangling on a branch, swirling leaves in the wind, and a heaping pile of leaves waiting to be jumped in!


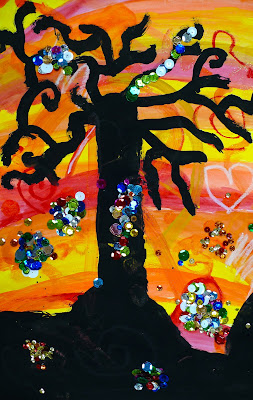


These paintings are hands down more beautiful than the glowing skies I've been witnessing on my drives home! My favorite thing about them is that no two paintings are alike even though we used the the exact same colors and subject-matter!

Check out a forrest of these beautiful trees on Artsonia!